Want to send out branded emails? First, you need to prepare proper content and eye-catching templates. Plain default designs won’t impress or encourage your customers to visit your website. Read this article to find out how to edit email templates in PrestaShop 1.7.
There are default email templates in PrestaShop. When do your customers receive such emails?
Creating an account on the website.
Subscribing to a newsletter.
Making a purchase.
Receiving a payment confirmation
Receiving a shipment confirmation and in some other cases.
You always have ready-made templates, but if you want these emails to look more unique, deliver more information to a customer and fit with your overall brand’s look better, you simply need to modify them. So, let’s consider in detail how to change email templates in PrestaShop 1.7.
The first way how you can do that is using the admin panel. You need to login and proceed to Improve section to:
International => Translations
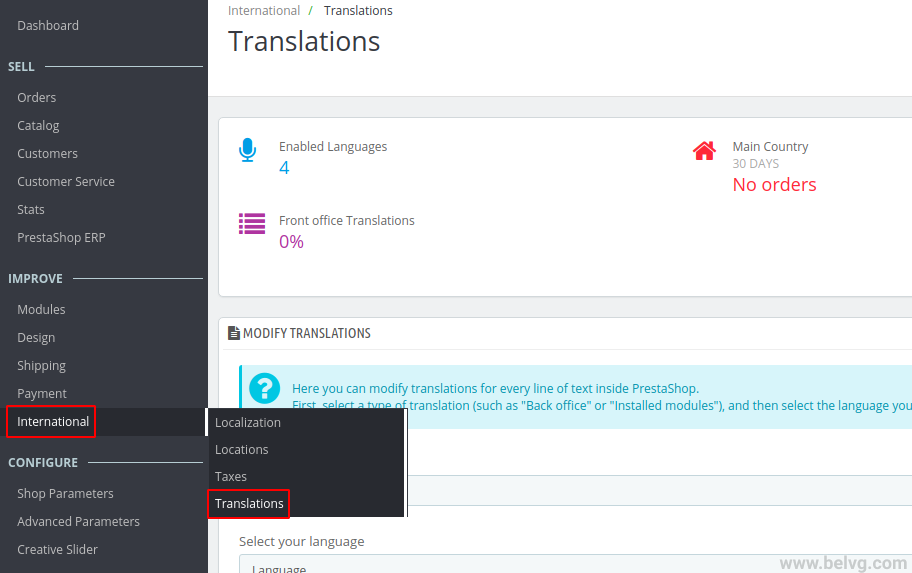
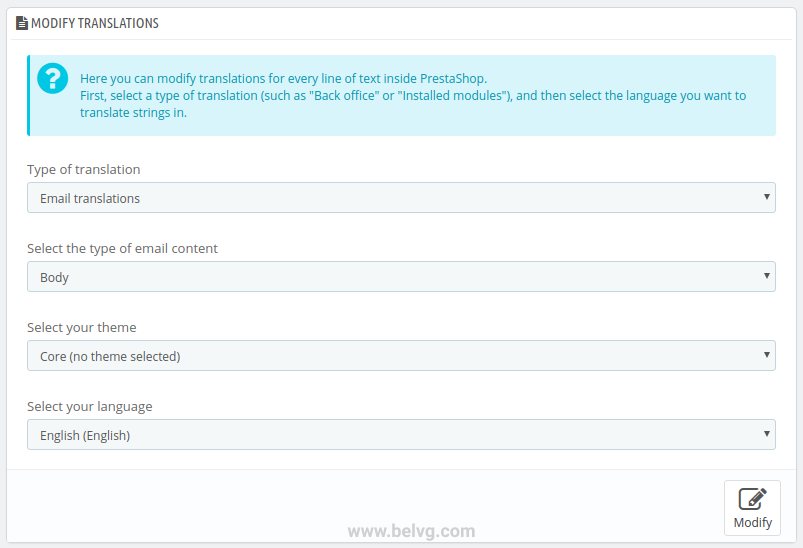
Here you will see the Modify Translations block. To edit email templates, select the following positions in drop-down menus:
- Select the type of translation: Email Translations;
- Select the type of email content: Body (in case you want to edit Email Subject just choose Subject);
- Select your theme: Core (no theme selected);
- Select your language: Choose the required language (in our case it’s English).
And then click the Modify button.
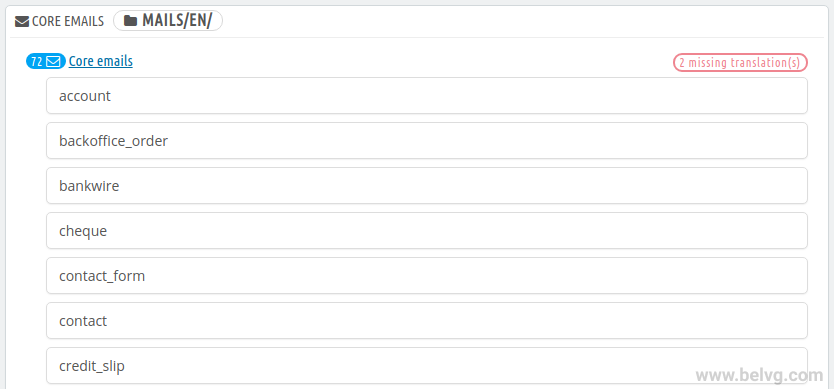
Here you will encounter email templates. Let’s take a look how you can edit, for example, Registration email. Click on Core Emails and select the account template.
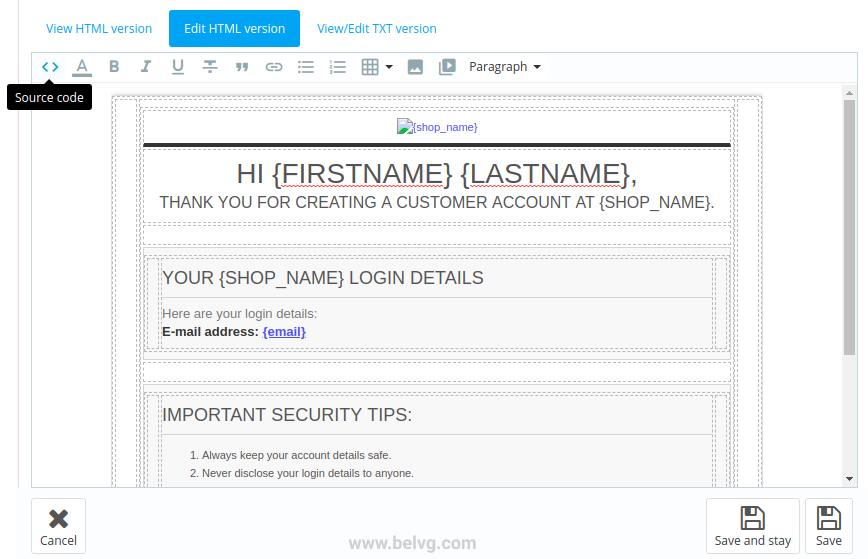
The View HTML version tab shows how the email recipient will see the message.
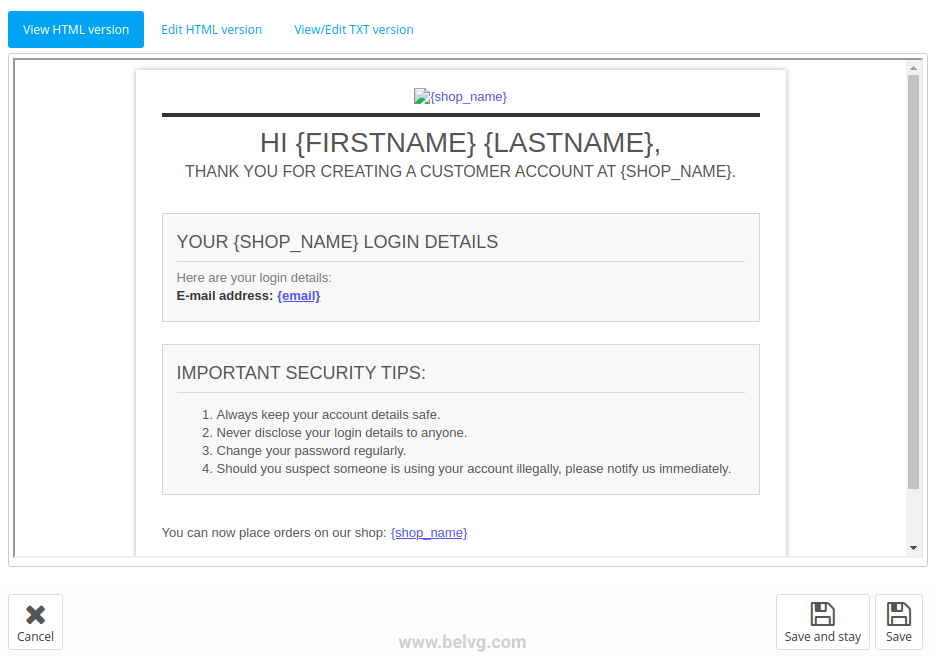
You can make changes in the email template on the Edit HTML version tab. Here you can change the structure of the email template and its content using the WYSIWYG editor. Be careful when you edit the template using the editor, as you may accidentally delete the necessary layout. If you are familiar with HTML, we recommend to disable the WYSIWYG editor and work with the template code directly. You can do this by clicking on the Source code icon – “<>” (view the image below).
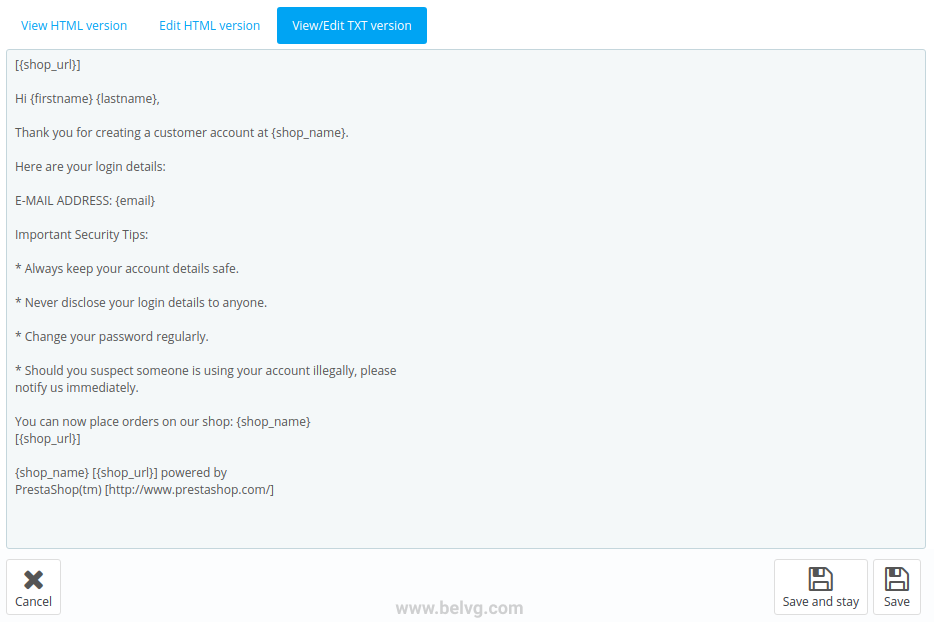
You can also edit only the content of the email with no risk to change the email template layout. To do this, go to the View/Edit TXT version tab.
Don’t forget to save all the changes and test the email to be sure that everything has been performed properly.
The same way you can easily edit any other email template in this list.
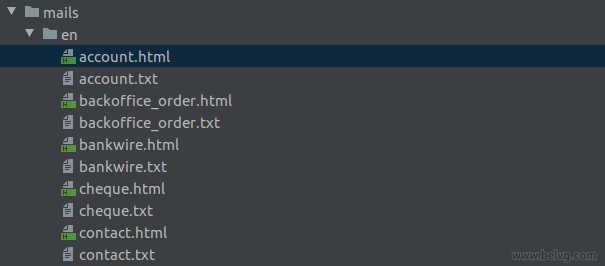
You can also follow another strategy and edit email templates directly. Here you can use the FTP manager. Just proceed to the Mails directory and choose the folder with the necessary language. Then, you will see all the files with email templates.
Conclusion
Following our guide, you will be able to send branded emails to your targeted groups. Using proper content and eye-catching techniques you will see a big raise in your Reach pretty soon.


